Cleaning hammered silver coins safely
Practical guide to cleaning UK hammered silver coins — what's safe, what destroys the patina, and a routine that gets the coin photographable without losing value.
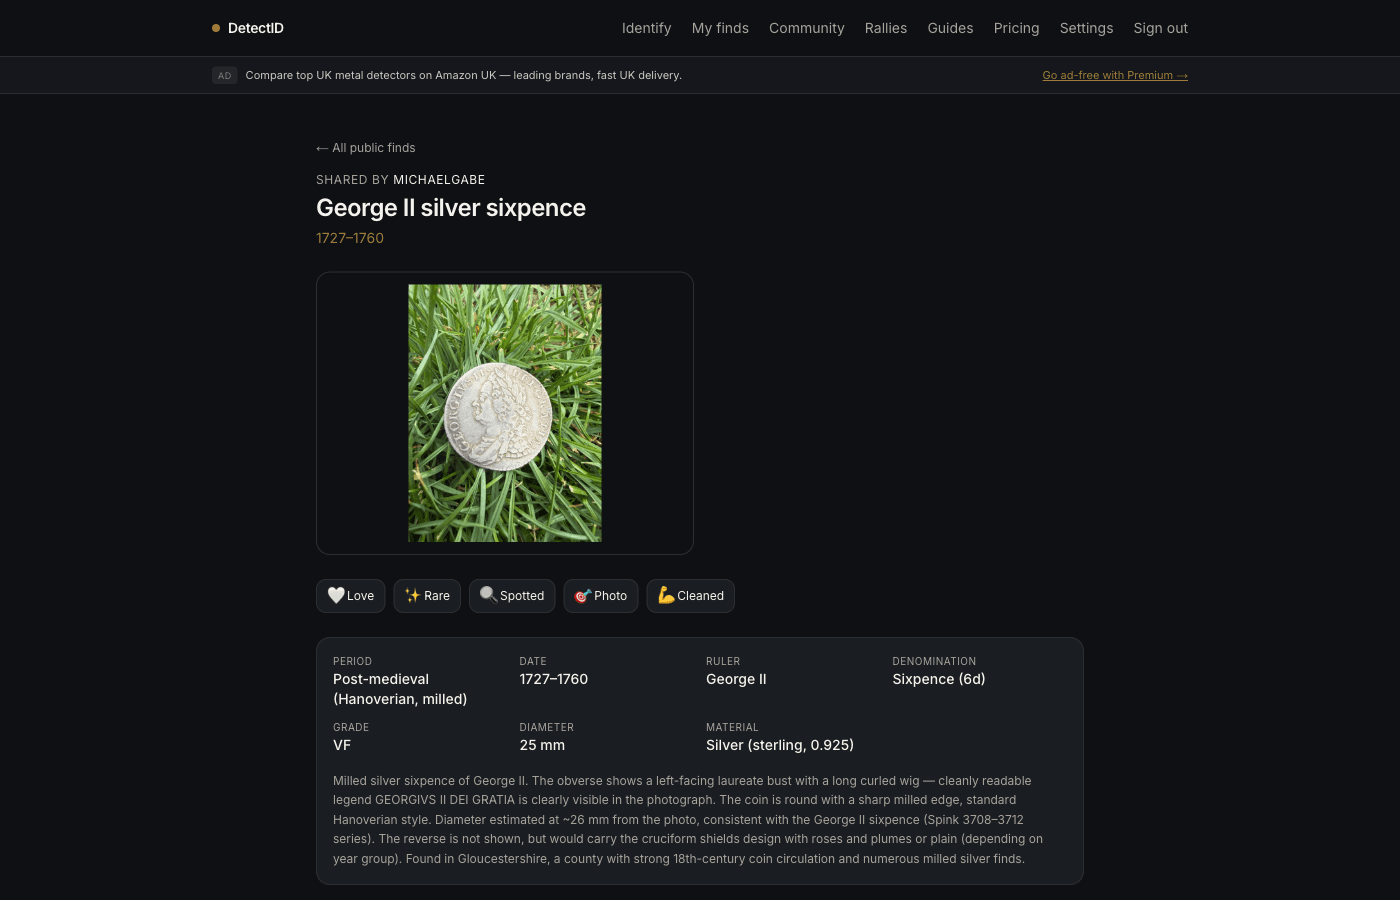
Hammered silver coins — pennies, halfpennies, groats, shillings — have been in the ground for 400 to 1,000 years. The patina you can see is not dirt. It’s a stable mineral surface that you can either preserve or destroy with a single bad decision. This is the safe approach.
The headline rule
Water and a soft brush. That’s it.Anything more aggressive than that risks irreversible damage to the surface and the legend, and the find’s identification value, archaeological value, and market value all sit on that surface.
Why patina is precious
When a silver coin sits in the ground for centuries, the surface layer slowly converts to silver chloride and silver oxide. The resulting patina — dark grey, dark blue, sometimes with a rainbow toning — is stable. It protects the silver underneath, it’s aesthetic, and it’s a key piece of evidence that the coin is an authentic ancient find rather than a recent fake.
Aggressive cleaning “brings up” the silver but destroys the patina. The result is a bright, harsh, “new” appearance that collectors and FLOs both view as a damaged coin. The bright silver coin in the photo is worth half what the patinated one was.
The safe routine, step by step
- Photograph the coin before cleaning. In the state you found it, mud and all. This is your before-record, insurance against any cleaning regret.
- Rinse under lukewarm running water. Tap water is fine. Hold the coin gently, let the water carry away loose soil. Two minutes max.
- Soft brush. A soft toothbrush, used gently in a circular motion. Wet bristles only. The goal is to dislodge adhered mud, not to scrub the surface.
- Rinse again. Water carries away the dirt the brush dislodged.
- Air dry on a soft cloth.Do not rub. Do not use a paper towel that’ll leave fibres. Pat very gently if you must. Let the coin sit for a few hours before photographing or handling further.
- Re-photograph.Now the legend and bust are visible, the engine and the FLO can read what’s there.
That’s the entire routine. Stubborn mud often needs repeated water-and-brush sessions over a few days, not stronger chemicals.
For stubborn soil deposits
If water and a brush isn’t shifting the soil, options ranked from safest to riskiest:
Distilled water soak (very safe)
Distilled water in a small dish. Submerge the coin for 24 hours. Soil deposits soften and lift off with gentle brushing. Repeat the soak-and-brush cycle as needed; some coins benefit from a week of daily sessions.
Olive oil soak (moderately safe)
Pure olive oil, small dish, submerged coin. Useful for harder encrustation. Weeks not days — an olive oil soak is a long-term, low-aggression treatment. Wash off with mild soap and water at the end.
Mechanical removal with a wooden pick (advanced)
A wooden cocktail stick, sharpened. Pick at adherent material gently. Wood is softer than silver patina so the patina survives; but the technique requires patience and a steady hand. Beginner-level coins should not be the practice ground.
What about ground silver and silver chloride encrustation?
Some hammered silvers come out with a green or pink crust (silver chloride, sometimes called “horn silver”). This is a sign that the silver underneath has been partly converted to halides over the centuries.
Don’t try to remove it at home. The crust is what’s holding the coin together; aggressive removal can collapse the find. Take it to your FLO or a conservator; some museums will stabilise it for you for free or a small fee.
The “just leave it” rule
If you’ve done two or three soak-and-brush sessions and the coin is still partially obscured, the safest thing is to stop. The FLO would rather see a dirty coin than a damaged one. DetectID’s identification engine reads dirty surfaces fine; you don’t need to get a coin sparkling for the engine to read it.
Photography tips for cleaned silver
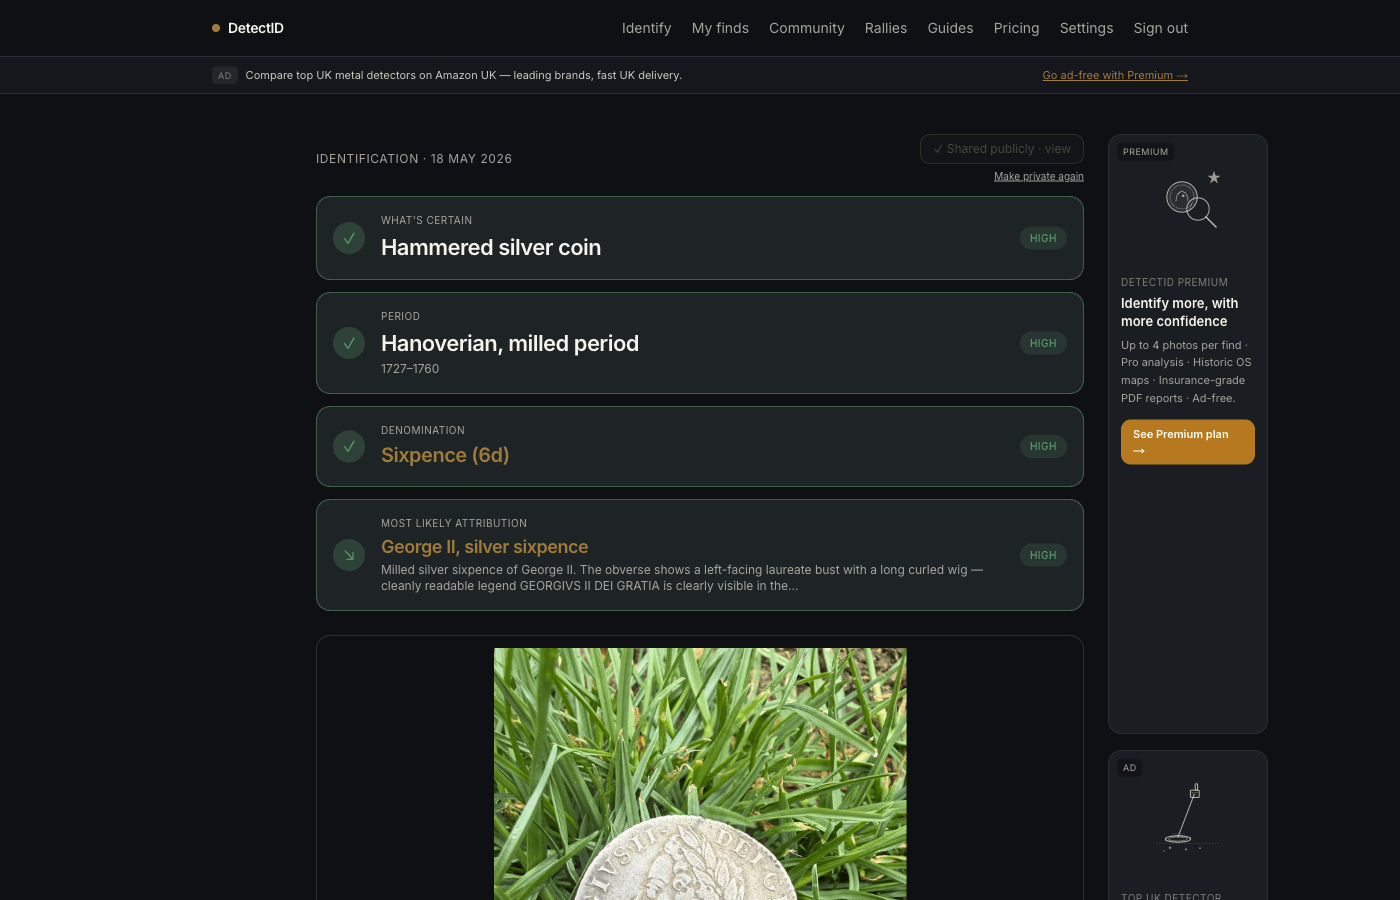
Once the coin is clean and dry, photograph it for identification and records. Hammered silver photographs well in diffuse natural light. See Photographing finds for identificationfor the full routine.
Why this matters for value and the hobby
An over-cleaned hammered silver coin loses 30–70% of its market value. An over-cleaned and damagedone loses 90%+. The hobby’s reputation matters too — the more finds get destroyed by bad cleaning, the more ammunition critics of detecting have. Responsible cleaning is part of being a responsible detectorist.
Common questions
What about a bit of dark patina that “wipes off”?
That’s not dirt — that’s the surface of the coin coming off. Stop immediately. The dark colour is the natural patina; any rubbing that removes it is removing original surface.
Can I use silver dip / commercial silver cleaner?
Absolutely not. Modern silver dip products are formulated for polished sterling silverware; they strip patina and damage struck-coin surface in seconds.
What about coin-cleaning kits sold for detectorists?
Some are fine — soft brushes, distilled water, plastic picks. Others are aggressive (mild acids, abrasive powders) and will damage hammered silver. Check the ingredients before using.
What if I’ve already over-cleaned a coin?
Unfortunately, no recovery. Patina doesn’t grow back on a usable timescale. Keep the coin in a stable dry environment to prevent further damage; the natural toning may slowly return over decades.
For Roman bronze, different rules
Roman bronze has different chemistry (bronze disease, copper oxides) and different cleaning protocols. SeeCleaning Roman bronze safelyfor the bronze-specific approach. Don’t apply silver-coin protocols to bronze or vice versa.
Next steps
- Roman bronze: Cleaning Roman bronze safely.
- Photographing cleaned finds: Photographing finds for identification.
- What grade the engine assigns: Reading the predicted grade.
Try DetectID on a real find
Upload a photo and we’ll return a calibrated shortlist with period, denomination, ruler and full reasoning chain.
Identify a find